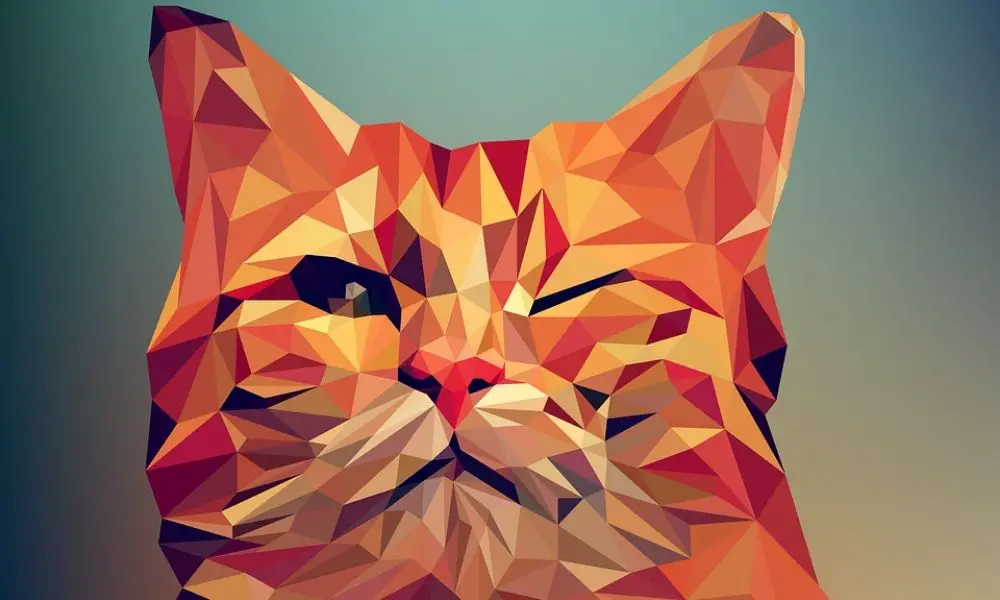
Vector graphics apply mathematical formulas to bring together lines, curves, and shapes to create an image. They give a lot of flexibility with resizing without losing resolution. That is why many designers use it for logos, poster designs, and so much more. But, having the right vector illustration tools is just the first step. You also need the best tips on how to create vector graphics and illustrations.
7 Ways to Create Vector Illustrations and Graphics:
1. Start with the Basics
Most designers will walk around with a sketchbook and pen. Want to know why? The best place to start a project is to put down your ideas on a piece of paper. Any time an idea pops into your mind, sketch it out.
It allows you to explore and play around with so many options. So, when you finally sit down in front of your laptop, you are clear on the direction you want to take.
2. Break Down Images into Base Shapes
A vector artist needs to work off constituent base shapes from the raster images. It offers a clear action path by not dealing with the picture as a whole. Can you work with the image as it is? The answer is yes, you can. But, at some point, you may start to feel like it is overwhelming.
You will not have a clear beginning or end, which can be confusing. Splitting it into the base shapes gives you workable chunks that are easier to manage. The best vectoring is easy with geometric shapes. But, you may not get the perfect circle, rectangle, or cone shape you are hoping for. In this case, you will need to make the adjustments as appropriate.
Yet, that is the beauty of vector designs. Do not be afraid to remove or add elements to the composition to achieve the right result.
Related: Best PicMonkey Alternatives
3. To Use or Not to Use Stock Images
To use or not to use stock images may be a question you have. Well, the good news is there is no set answer. It depends on you as a designer. Some feel that stock vectors stifle creativity and are overused.
But, the stock images can be convenient if you don’t want to start from scratch. Weigh the pros and cons depending on your project, then decide.
See Also: Photoshop Alternatives
4. Focus On Perspective
You may have come across illustrations that lack depth or look flat. It is a clear indication that the designer ignored perspective. You want to focus on distance and size for more realistic vector illustrations.
The more the distance, the smaller the size of the object and vice versa. There are several ways to achieve perspective.
- Use grids to get a vanishing point and horizon. Tools like illustrator allow you to customize the grids as you wish. You can add or remove boxes. It also allows for shortening or lengthening the vanishing point.
- Use the bevel and extrude feature to make the objects editable. You get different anchor points and parts, allowing you to make the relevant tweaks.
- Use Pencils and Brushes for Better Output
- With pens, minimize the anchor points as much as possible. Instead, opt for the curve capacity to achieve smoother lines and shapes
- The Pen tool will also give you smooth lines.
- Calligraphic brushes are a time saver. Let’s say your illustration has stars in the sky. Without a doubt, you would spend a lot of time creating each individual star. Yet, a scatter brush will have your starry sky ready in no time.
- Brushes make it look like you have drawn the vector by hand. One handy tip is to create a brush for objects or elements that you use a lot.
- The pencil tool on illustrator is excellent for sketches
- Varying the thickness of strokes will add depth to your drawings.
5. Line Tracing for Smooth Lines
You will find that the more anchor points, the less control you have over the smoothness of the lines. It helps to have very few anchor points, far from each other. Add or remove anchors with the Add or delete Anchor points feature.
You also want tangents on the curve for smoother lines. Make changes to the anchor points using the Convert Anchor Point feature. What you get is the ability to change the path of your lines.
6. Create Realism with Color
Color brings a lot of creativity and fun to your vector illustrations. Vivid colors offer a fantastic way to achieve photo-realistic designs. Contrasting colors make the artwork stand out. Retro illustrations look great with pastel or more gentle colors.
Adobe Illustrator has tons of colors you can use. And, the Swatch library allows you to create your own. The best part is you can save your swatches and use them for future projects. Radial and linear gradients are great for showing light sources resulting in more depth. When coloring, start by establishing the angle/position of the light. It will determine where you put the highlights and shadows using light and dark colors, respectively.
Radial gradients work well for round shapes and ovals. Linear is excellent for flat planes. A combination of the two gradients is perfect for working with irregular shapes. You will need to practice color blending to achieve the right results. The Mesh tool is an excellent aid for such jobs.
Another feature available to you is transparent gradients. It is available on the newer Illustrator versions. The opacity makes it easy to shade. Further, if you want a watercolor effect, you will love the tool. Pay attention to blending the colors well when building gradients. If you don’t, it will be easy to notice the harsh transitions.
Also Check: What Are the Examples of Visual Content?
7. Layering Tips
You will achieve fantastic results by using layers in your vector graphics or illustrations. It allows you to separate different elements such as background, characters, and fonts. Remember to keep track of all the layers because you may end up with quite a bit.
You May Also Like:
Conclusion
We have shared six ways to create vector graphics and illustrations. Have the right tools and techniques, and you will create some unique artworks. It helps to have the right tools to achieve the best job. And there is some good news. You have access to Adobe Creative Cloud discount to start you off on the right path. Save money with subscription plans that are pocket-friendly. You get tons of resources that will have you designing like a pro.
Good luck with your vector graphics and illustrations project!
Dan has hands-on experience in digital marketing since 2007. He has been building teams and coaching others to foster innovation and solve real-time problems. Dan also enjoys photography and traveling.

